About Diaspora software
Published under GNU Free Documentation License v1.3.
http://www.gnu.org/copyleft/fdl.html

Diaspora software is a free (FOSS) personal web server that implements a distributed social networking service. Installations of the software form nodes (termed “pods”) which make up the distributed Diaspora social network. It allows its users to host their data with a traditional web host, a cloud-based host, an ISP, or a friend. Pods can then interact to share status updates, photographs, and other social data. The framework, which is being built on Ruby on Rails, is free software and can be experimented with by external developers.
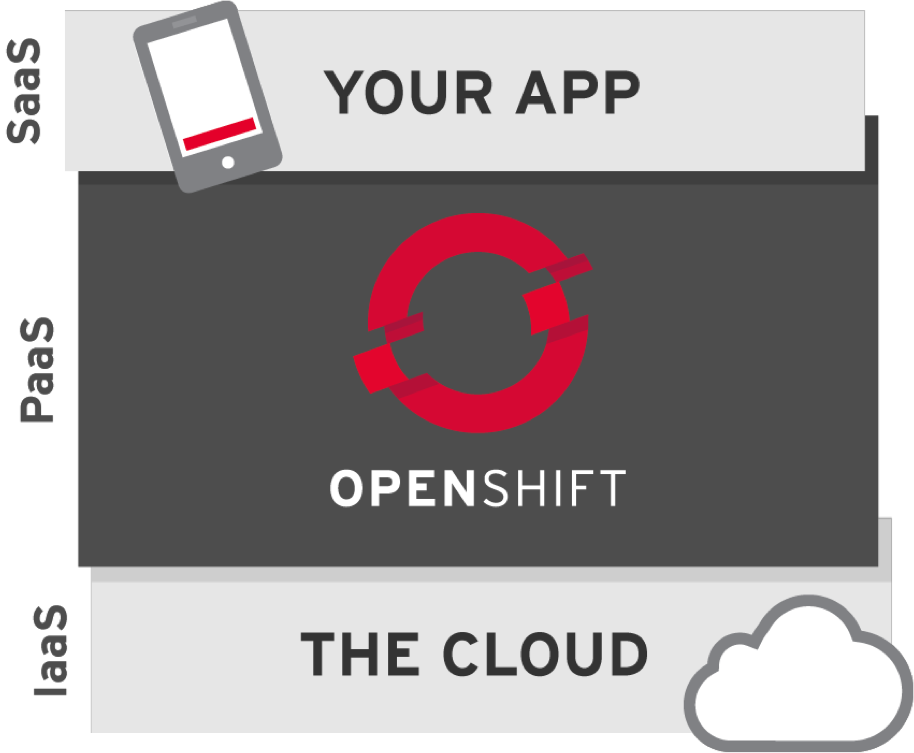
OpenShiftisa cloud computing platform as a service (PaaS) product from Red Hat. The software that runs the service is open-sourced under the name OpenShiftOrigin, and is available on GitHub. Developers can use Git to deploy web applications in different languages on the platform (Java, PHP, Ruby, Python, Node.js, and Perl). With few clicks you can deploy a wordpressor node. jsapplication on openshifteasily. You can even try out RedhatRhcloud for free and the free plan includes 1.5GB memory and 3GB disk-space
Ubuntu based instruction
-
First, create an account on Open Shift
-
Install Ruby (all steps are on local ubuntu system)
$ sudo apt-get install ruby-fullrubygems -
Install git
$ sudo apt-get install git-core -
After you install both Ruby and Git, verify they can be accessed via the command line:
-
$ ruby -e ‘puts “Welcome to Ruby”‘
Welcome to Ruby
$ git –version
git version 1.7.11.1 -
With Ruby and Git correctly installed, you can now use the RubyGems package manager to install the OpenShiftclient tools. From a command line, run:
$sudogeminstallrhc -
After the OpenShiftclient tools are installed, run:
$rhc setup -
If you have none yet generate a SSHkeypar:
ssh-keygen -
Create the application:
rhc app create diaspora \
ruby-1.9 mysql-5.5 \
‘http://cartreflect-claytondev.rhcloud.com/reflect?github=smarterclayton/openshift-redis-cart’ -
If it asks you to upload your SSH key, answer yes.
-
Change the directory to diaspora;
cd diaspora -
Run the following commands:
cd diaspora
git remote add upstream git://github.com/jhass/diaspora-openshift.git
git fetch upstream
git reset –hard upstream/master
git push -f origin master -
Grab a coffee.
Configuration
Configuration is done via environment variables. To change something from the default sets themviarhcenvset, seerhchelpenv.
To see what’s available, read config/diaspora.yml.example.
Adding yourself as an admin
After you created an account on your new diaspora* pod, you can make yourself an admin with:
rhcsshdiaspora– ‘/bin/bash -c “cd$OPENSHIFT_REPO_DIR; source.openshift/diaspora_configuration; bundle exec rails runner \\”Role.add_admin(User.where(username: \’yourusername\’).person)\\””‘
OpenShift control panel (rhcloud.com)
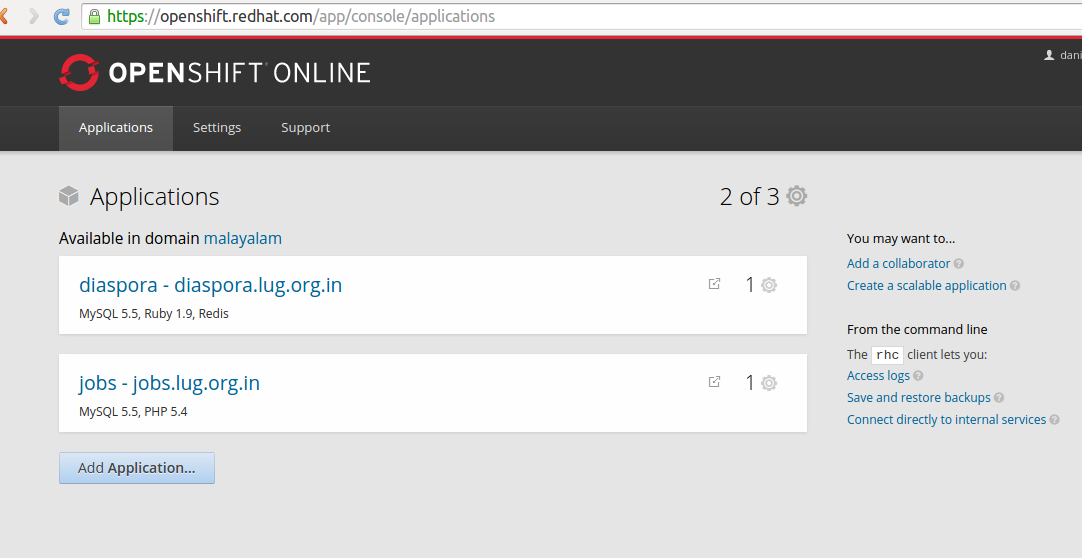
Have lookat my Diaspora* POD http://diaspora-malayalam.rhcloud.com


Leave A Comment
You must be logged in to post a comment.